How to Create an Amazon Storefront?
Step-by-Step Guide to Building Your Brand Space on Amazon
By ChannelMAX Staff Writer
Aug-2025#17
Creating an Amazon Storefront is one of the best ways for brands and sellers to show their products in a customized, professional way on Amazon. Unlike a regular product listing, an Amazon Storefront lets you design a dedicated space with your brand logo, banners, product categories, and unique storytelling elements that reflect your brand’s identity. It’s like having your own mini-website inside Amazon, where customers can explore all your products.
In today’s competitive online market, it’s very important to build trust in your brand and make your products stand out. With an Amazon Storefront, you can not only display your products attractively but also use analytics to track shopper behavior and improve your store to get more sales.
In this article, we will walk you through everything you need to know about creating an Amazon Storefront, including the requirements, step-by-step setup, and tips to design a store that converts visitors into buyers.
What is an Amazon Storefront? 
An Amazon Storefront is like your own small website inside Amazon. It’s free and lets brand-registered sellers show all their products in one place and share their brand story.
Instead of customers seeing your products mixed in with other competitors on Amazon, your Storefront puts everything together in a clean, attractive space—without competitor ads. You can make it look special with banners, videos, lifestyle photos, and product displays, so it feels like your own shop inside Amazon.
Only sellers enrolled in the Amazon Brand Registry can use it. A Storefront can help you:
a. Build brand recognition.
b. Highlight best-selling or seasonal products.
c. Create a special shopping experience for different customer groups.
d. Drive traffic from ads, social media, or email directly to your store.
Think of it as your brand’s own showroom inside the world’s biggest online store.
Why You Should Have an Amazon Storefront?
1. Helps People Know Your Brand
An Amazon Storefront is like your brand’s personal shop on Amazon. It’s a dedicated space where customers can see all your products in one place, along with photos, videos, and your brand story. Since there are no other sellers shown, shoppers focus only on you. This not only builds recognition but also helps turn casual visitors into loyal buyers who remember your brand.
2. Can Increase Your Sales
A storefront shows customers your full range of products, not just one item. If they come for one thing and find other related items they like, they’re more likely to add more to their cart. This can increase your total sales and average order value. You can also suggest related products more easily.
3. Makes Shopping Easier
The layout of storefronts is well-organized and easy to browse. You can create sections for different categories, highlight your best-sellers, or feature seasonal or special collections. This saves time for shoppers and makes their shopping experience more enjoyable.
4. Keeps Away Competitors
On regular Amazon product pages, competitor ads often appear, which can pull buyers away. In your storefront, customers only see your products, and it is a competitor-free zone. This keeps their attention on you and increases the chance they’ll buy from your brand.
5. Supports Marketing Campaign
You can send people directly to your storefront from social media, emails, or ads. This gives them one place to explore everything you sell, making your marketing campaigns more effective than sending them to just one product page.
6. Gives You More Control Over Presentation
In your storefront, you decide the images, videos, text, and layout that best represent your brand. You can show promotions, launch new products, or update the look to match your marketing theme—something you can’t fully do on regular product pages.
Who Can Create an Amazon Storefront?
Any third-party seller who is part of Amazon’s Brand Registry can create an Amazon Storefront, and the best part is—it’s free. But there are certain rules you need to follow to qualify. Here’s what you need to know:
1. Have a Professional Seller Account
Amazon has two types of seller plans—Individual and Professional. To make a Storefront, you must have the Professional plan. This plan costs a monthly fee but gives you access to more tools and features to grow your business. You can list products in bulk, see advanced sales reports, run ads, and join Brand Registry. So without the Professional plan, you cannot enroll in Brand Registry, and without Brand Registry, you cannot create a Storefront.
2. Be Enrolled in the Amazon Brand Registry
The Brand Registry is Amazon’s way of confirming that you are the official owner of your brand. Once you’re approved, you can use powerful tools like:
a. Store Builder – to design your Storefront without needing coding skills.
b. A+ Content – to make your product listings look more professional and appealing.
c. Brand Analytics – to understand your customers better and improve sales.
If you’re not enrolled yet, you’ll need to apply by submitting proof of your brand ownership. You have to submit details about your trademark, product categories, and images showing your logo on your products or packaging.
3. Brand Must Have a Registered Trademark
Your brand name must have an officially registered and active trademark in the country where you sell. A trademark is legal proof that your brand name or logo belongs to you. Amazon only allows Storefronts for brands that have a registered or pending trademark.
a. If your trademark is still being processed, you can use Amazon’s IP Accelerator to speed up the process and become eligible faster.
b. The trademark must match your brand name exactly.
Without the trademark, you cannot join the Brand Registry.
4. Sell Products Under Your Own Brand
The products you sell in your Storefront must have your trademarked brand, not unbranded or generic items. They should clearly display your brand name or logo on the product or its packaging.
Even if the product is made by someone else, you can still sell it in your Storefront — but only if it’s branded as yours. You can source the product from a manufacturer, add your brand name or logo to the product or packaging, and make sure your brand is trademarked and in Brand Registry. Amazon checks this to make sure your Storefront truly represents your brand and not just random products you resell.
Example: If you buy generic water bottles from a factory, put your brand’s logo on them, and your brand is registered with Amazon, you can list those bottles in your Storefront.
If you are a professional seller with a trademarked brand that’s enrolled in Amazon’s Brand Registry, and you sell your own branded products, you can create your own Amazon Storefront for free. This allows you to showcase your products in a custom online store, tell your brand’s story, and make your Amazon presence more professional and engaging. If you are not in the Brand Registry yet, that’s your first step. You cannot create an Amazon Storefront until you complete the registration and prove that you are the owner of the brand.
How to Create an Amazon Storefront?
Here is an easy step-by-step guide to set up your Amazon store, even if you’ve never built one before.
Step 1: Log in to Seller Central
a. Go to sellercentral.amazon.com or your country’s Seller Central site.
b. Enter your email and password to log in.
c. You need an active Professional Seller account — the Individual plan doesn’t allow you to make a storefront.
d. Make sure your brand is enrolled in Amazon Brand Registry. Without Brand Registry, you won’t be able to use the Store Builder.
Why this matters:
Seller Central is the main place from which you control your Amazon business. From here, you manage products, orders, ads, and your store design. Brand Registry ensures Amazon knows you’re the real owner of your brand.
Step 2: Open the Store Builder Tool
a. In the top menu, click Stores → Manage Stores → Create Store.
b. This will open Amazon’s Store Builder — your workspace for designing the store.
c. You don’t need to know coding. Amazon gives you a drag-and-drop editor where you can add text, images, videos, and products by simply clicking and moving things around.
Think of it like this:
If your brand had a physical shop, Store Builder is where you arrange the shelves, put up posters, and make it look attractive — but in an online form.
Step 3: Choose the Brand You Want to Feature
a. Amazon will show you a list of brands connected to your Brand Registry account.
b. Select the brand you want to build the storefront for.
c. If you don’t see your brand, it means it’s not in Brand Registry yet — you’ll need to apply before continuing.
Tip: Your storefront will only show products under the brand you select, so choose carefully if you sell multiple brands.
Step 4: Pick a Template and Start Designing
Amazon gives ready-to-use templates so you don’t have to start from scratch:
a. Product Grid – Shows many products at once. Best if you have many products.
b. Marquee – Big images and banners. Great for brand storytelling.
c. Showcase – Focuses on a few products. Ideal for premium or limited items.
Once you pick a template, you can:
a. Add product boxes, images, videos, and banners.
b. Rearrange sections to fit your brand’s style.
c. Use Amazon’s preview tool to see how your store looks in real time.
Design tips:
a. Use high-quality images so your store looks professional.
b. Stick to your brand colors and fonts for consistency.
c. Don’t overcrowd pages — keep it clean and easy to navigate.
d. Add lifestyle photos showing your products in use to create a connection with customers.
Step 5: Add Pages and Navigation Menus
Your storefront can have multiple pages, just like a normal website. Examples:
a. Home Page – Introduce your brand, show top products, and share your story.
b. Category Pages – Group similar products (e.g., “Women’s Shoes,” “Electronics,” “Kitchenware”).
c. Promotion Pages – Highlight seasonal sales, festive offers, or new launches.
Make sure you create a clear navigation menu so customers can easily move between pages. Keep page names short and simple.
Step 6: Add and Link Your Products
a. Inside the Store Builder, use the search bar to find your products by name, ASIN, or SKU.
b. Add them to your store pages in collections like:
i) New Arrivals
ii) Best Sellers
iii) Under $50
c. Make sure each product is linked directly to its Amazon product page so customers can buy with one click.
Tip: Grouping products helps customers browse without feeling overwhelmed.
Step 7: Make Your Store SEO-Friendly
SEO (Search Engine Optimization) helps people find your store when they search on Amazon. To improve visibility:
a. Use keywords customers are likely to search for in:
i) Page titles (e.g., “Organic Cotton Baby Clothes”)
ii) Image alt text (short descriptions for images)
iii) Product descriptions (clear, benefit-focused text)
iv) Banner headlines (catchy but keyword-rich terms)
b. Avoid stuffing too many keywords — keep it natural and readable.
Step 8: Preview, Test, and Publish
a. Before publishing, use the Preview option to check your store on both desktop and mobile.
b. Make sure:
i) Images fit well on smaller screens.
ii) Buttons are big enough to tap on phones.
iii) Navigation is smooth.
c. When satisfied, click Submit for Publishing.
d. Amazon will review your store for compliance. This usually takes up to 72 hours.
Once approved, your store will be live for customers to visit and shop from.
Extra Tip: Keep updating your storefront every few months — add new products, change banners for sales seasons, and update images to keep things fresh. A well-maintained store not only attracts more visitors but also helps boost sales over time.
Tips to Get More Sales from Your Amazon Store
1. Use Lifestyle Photos
a. Use photos of people using your product in real-life situations.
b. Lifestyle images help customers imagine using it themselves.
c. Example: If you sell backpacks, show someone using it at school or on a trip.
d. They also help your product stand out from plain white-background images.
2. Add a Brand Video
a. Create a short, clear video about your product or brand.
b. Show how the product works, its special features, and benefits.
c. Share your brand’s story to connect with customers.
d. Add customer reviews or unboxing clips for more trust.
e. Keep videos short (30–60 seconds) so people watch until the end.
3. Show Bestsellers First
a. Put your top-selling products at the top of your store page.
b. Use tags like “Bestseller” or “Top Choice” to grab quick attention.
c. Mention if the product has many good reviews or ratings.
d. People trust what others are already buying.
4. Run Holiday or Seasonal Offers
a. Add banners for Christmas, Prime Day, or the New Year.
b. Give bundle deals, free shipping, or extra discounts for a limited time.
c. Use countdown timers or phrases like “Limited Time Offer” to encourage quick purchases.
d. Seasonal themes make your store feel timely and engaging.
5. Check Store Performance
a. Use Amazon Store Insights to see which products get the most clicks and sales.
b. Check where visitors come from—search, ads, or social media.
c. Review data every week or month to see what’s working.
d. Improve low-selling products with better photos, descriptions, or offers.
6. Keep Updating
a. Add new products often so your store looks fresh.
b. Update photos, banners, and videos for trends and seasons.
c. Update product descriptions with the latest details, features and keywords.
d. A fresh and active store shows that your brand is trustworthy and serious about business.
7. Write Clear Product Titles
a. Include brand name, main feature, and size/color.
b. Example: “XYZ Stainless Steel Water Bottle – 1 Litre – Leakproof, BPA-Free.”
c. Clear titles help buyers understand your product instantly.
8. Use High-Quality Images
a. Use sharp, bright photos from different angles.
b. Add zoom-friendly images to show details.
c. Show size comparisons (like in a person’s hand) to avoid confusion.
9. Organize Products into Sections
a. Make categories like “New Arrivals,” “On Sale,” “Bestsellers,” and “Gift Ideas.”
b. This helps customers find products quickly.
10. Highlight Reviews & Ratings
a. Put products with high ratings and good reviews at the top.
b. Add short review quotes in descriptions if allowed.
c. Good feedback builds buyer confidence.
11. Promote on Social Media
a. Share your Amazon Store link on Instagram, Facebook, and YouTube.
b. Post product demos, customer stories, and behind-the-scenes videos.
c. Social media traffic can increase store visits and sales.
Common Mistakes to Avoid
1. Too Many Items on One Page
If you put too many products, pictures, or text in one place, the page looks messy. Shoppers may get confused and leave without buying. Keep your design clean and simple so they can focus on the main items.
2. Bad Quality Pictures
Online shoppers can’t touch or feel the product, so they depend on photos. If pictures are blurry, dark, or too small, they may think your products are not good. Use bright, clear, and high-quality images from different angles.
3. Not Mobile-Friendly
Many people browse and buy directly on their phones. If your store doesn’t load well on small screens, has tiny buttons, or takes too long to open, shoppers might leave and end up buying from others. Always test your store on mobile to make sure it works well.
4. No Keywords in Your Content
If you don’t use the right words in your product titles, descriptions, and pages, fewer people will find your store on Google or Amazon. Keywords help search engines show your store to the right customers.
5. Slow Loading
If your store takes more than a few seconds to load, shoppers may leave before it loads. Slow-loading sites can frustrate people and make you lose sales. Use smaller image sizes, remove unnecessary elements to keep it fast.
In short, an Amazon Storefront is like your own shop inside Amazon. It lets you show your products, tell your brand story, and guide customers easily. With a simple design, clear product groups, and good images, shoppers can find and buy faster. Using the right keywords and keeping your store updated will help bring more visitors.
With the right effort, your storefront can become more than just a product listing—it can be your main sales hub on Amazon, attracting traffic, building your brand image, and boosting your overall sales.
Also Read: Amazon Advertising Campaign: A Complete Guide to Maximizing Sales
Disclaimer:
Amazon is the registered trademark of the e-commerce brand.
About ChannelMAX.NET:
ChannelMAX offers Amazon Repricer that runs on the latest AI Repricing agents to do Amazon Pricing Management or Amazon Repricing. Based on Amazon SP API, the repricing engine or repricer runs 24/7 and efficiently manages Amazon prices to maximize your BuyBox with profit optimization. Established in 2005, ChannelMAX has been integrated with Amazon technology since 2007, helping thousands of third-party sellers on various eCommerce platforms. Some of the eCommerce platforms, aka marketplaces, supported by ChannelMAX.NET, are Amazon, Walmart, eBay, and Shopify. Some of ChannelMAX key offerings include ChannelMAX Amazon Repricer, 2ndly, ChannelMAX Amazon FBA Audits and FBA Refunds management, an offering for managing Amazon FBA Refunds Reimbursement management for lost or damaged or misplaced inventory for which Amazon is responsible and for which sellers deserve appropriate credit reimbursement from Amazon. ChannelMAX Services offer Remote (aka Virtual) Full-Time eCommerce Assistant to help 3P sellers run their daytoday business.
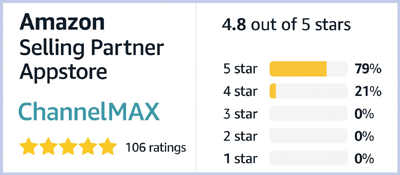
Check ChannelMAX at Amazon Selling Partner Appstore, an application with a 5 star rating.